The Photo Exhibition of SAMURAI FOTO 2018
Photoshop-Seminar by Kohji Suwa
SAMURAI写真展 2018セミナー
諏訪光二先生によるPhotoshopセミナーを開催
held on March 3rd, 2018 / 2018年3月3日 開催
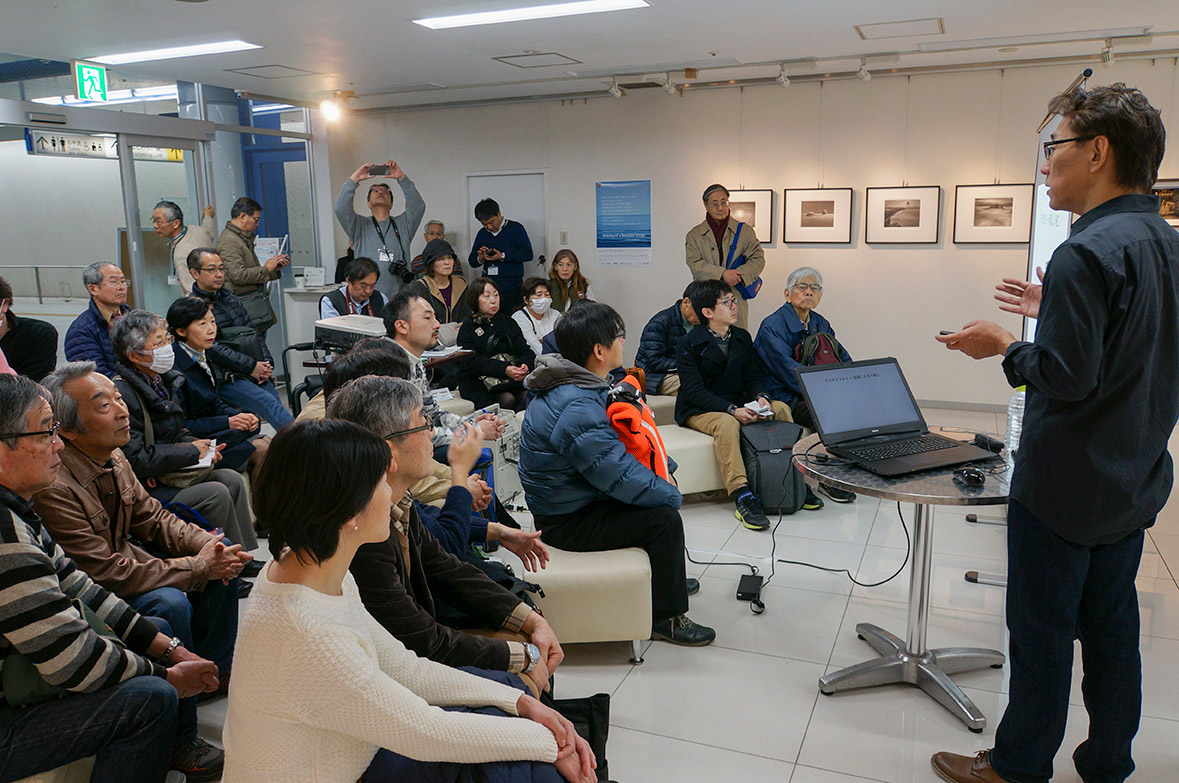
From February 27th to March 4th, SAMURAI FOTO held our 4th Photo Exhibition, “Making a beautiful bridge” at Subway Gallery M in Minatomirai station, Yokohama. There, a photographer, Kohji Suwa held a free seminar; Lossless Processing and Basic Printing in Photoshop
※For the seminar schedule; Click here
※For the photo Exhibition; Click here
Provided by Adobe systems Ltd.
2018年2月27~3月4日、横浜・みなとならい駅に
ある「サブウェイギャラリーM」で開催されたSAMURAI FOTO写真展4th “Making a beautiful bridge”において、写真家・諏訪光二氏によるセミナー「Photoshopによるロスレス処理とプリントの基本」を開催しました。
※セミナースケジュールについては
こちらをご覧ください。
※写真展についてはこちらをご覧ください
協力:アドビシステムズ 株式会社
Photo retouching started from silver halide photographic prints
「フォトレタッチは銀塩時代に生まれたもの」
Suwa is one of the valuable photographers with a lot of knowledge of Photoshop. He gave a lecture about it clearly and simply. Visitors eagerly listened and took notes at the seminar.
黎明期から使いこなしてきた諏訪先生はPhotoshopの隅から隅まで熟知。誰にでもわかりやすく教えられる貴重な写真家なので、参加者も真剣にメモを取られていました。
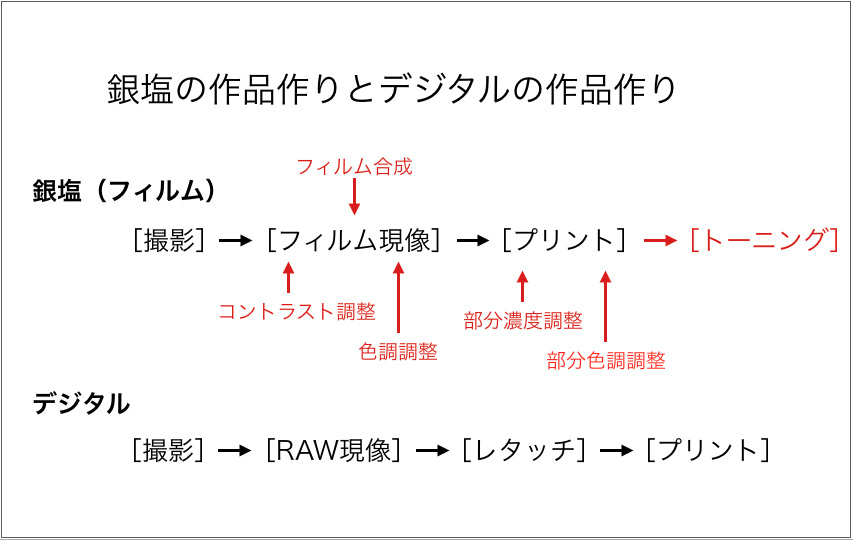
Suwa has worked on the silver halide photography for a long time. Photo retouching has been done in silver halide photographic prints, just like digital processing. Thanks to Photoshop, photo retouching gets easier, so let’s utilize it for your photography more.
銀塩写真にも長く携わってきた諏訪先生。銀塩時代でもじつはいまのデジタル処理と同じことをしていて、Photoshopによってこれらが簡単に自分の手でできるようになったメリットは大きく、利用しない手はないという。
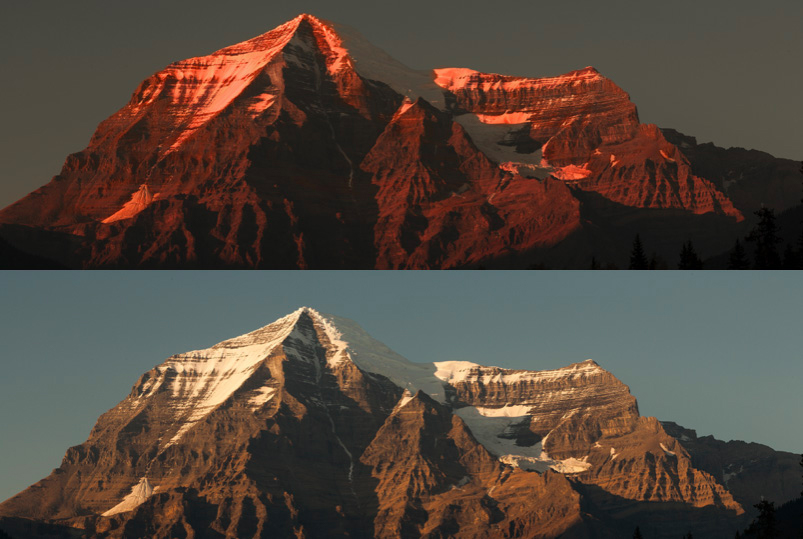
This is a silver halide print of Suwa. The technique of coloring the mountain range red is not a new thing. In old times, people have done photo retouching in silver halide photography to match the image that they have in their mind.
諏訪先生による銀塩プリント。このように山並みを赤くすることも昔からあり、自分のイメージに合うように仕上げるためにフォトレタッチは銀塩時代からあったという。

An American photographer, Ansel Adams wrote how to process photographs in his book. The idea of photo retouching had already existed at that time. (reference: ‘The Print’ by Ansel Adams)
アンセル・アダムスによる現像指南書を見ても、撮影した写真をどのように処理するかが記されている。フォトレタッチという概念はこの時代にすであったということになる。

This is a note of Suwa. Before making monochrome print of silver halide, he thought of the details of the photo and worked hard on it.
こちらはモノクロ銀塩プリント前の諏訪先生のメモ。銀塩でもディテールの出し方、シャドウの出し方、部分的な焼き込みなど細かく作業されているのがわかる。
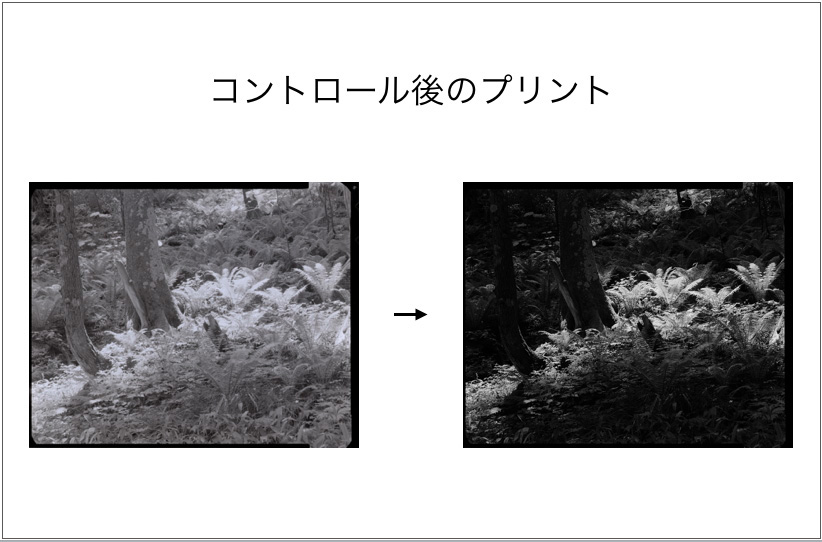
The right one is printed based on Suwa’s note. We see the difference from the left one without retouching. To bring the photograph close to your image is a part of the photo expression.
メモに基づいて仕上げた作品が右側。レタッチしていない左側の写真とはかなり異なる。自分の表現したいものに近づけることも写真表現の一部でもあるといっていいだろう。
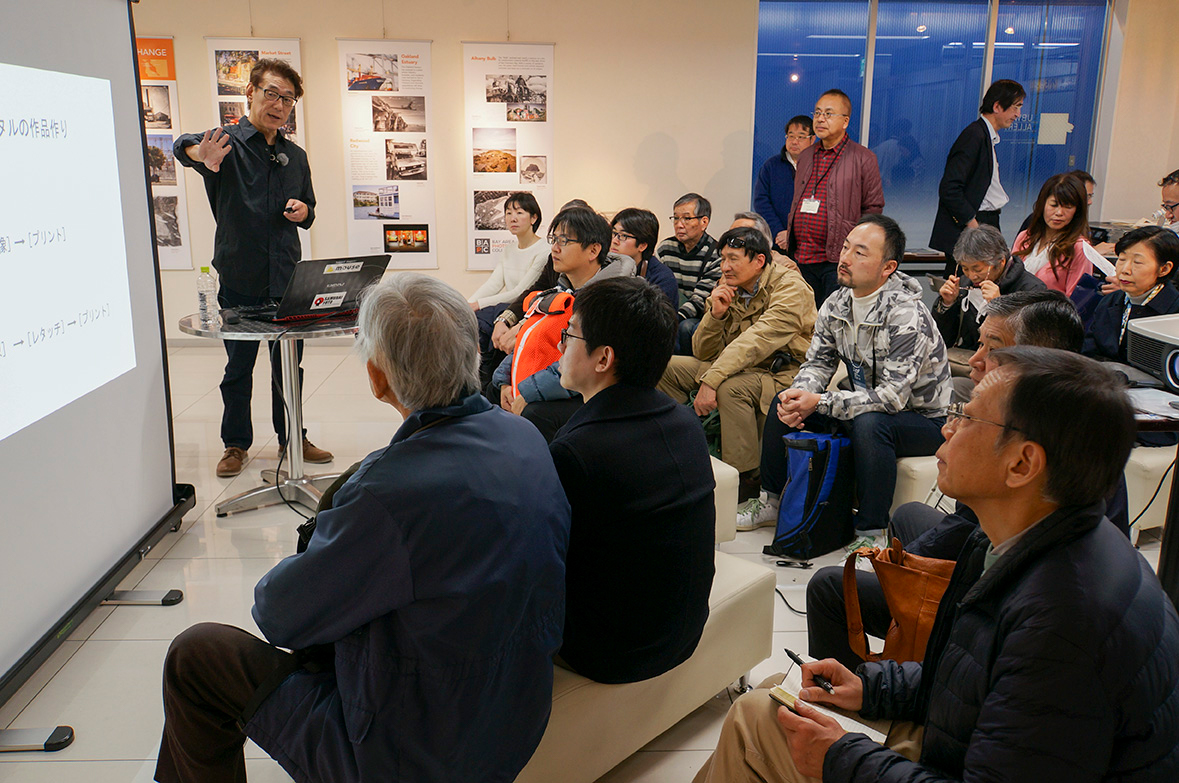
The basics of lossless processing by Photoshop
「Photoshopによるロスレス処理とプリントの基本」
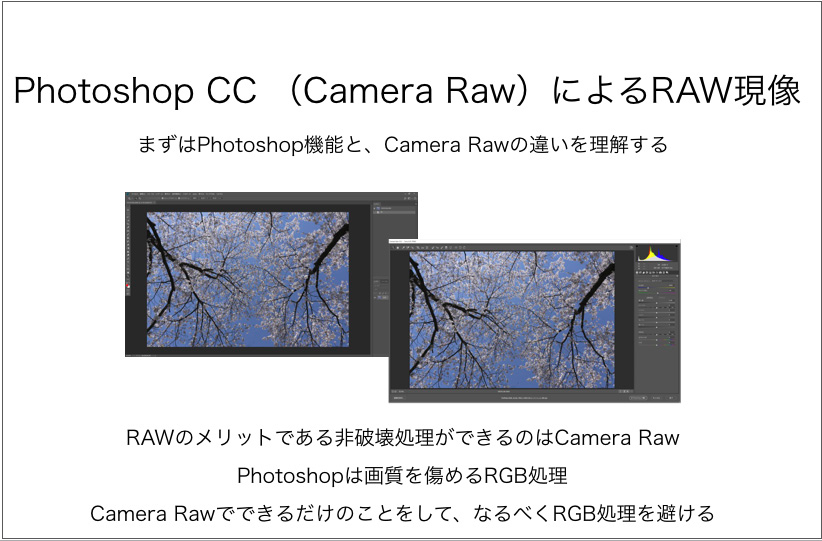
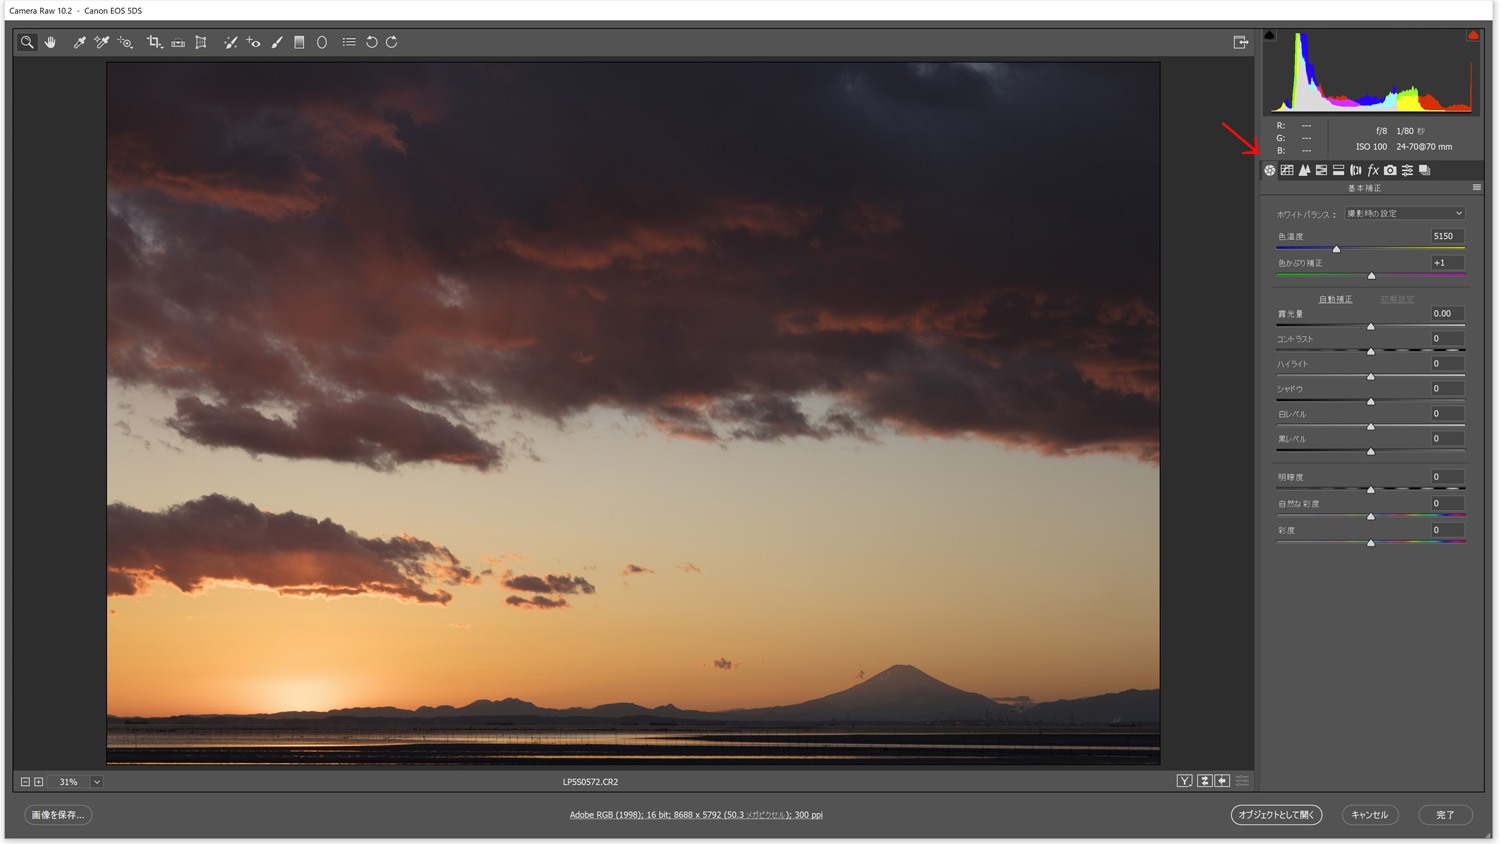
Use a high-resolution camera and shoot in RAW. Develop the photo with Camera Raw, so that the photo won’t become deteriorate.
まずは目的にあった高解像度のカメラを使い、RAWで撮影する。Photoshop CCのRaw現像ソフト「Camera Raw」で現像するのが画像の劣化がない。
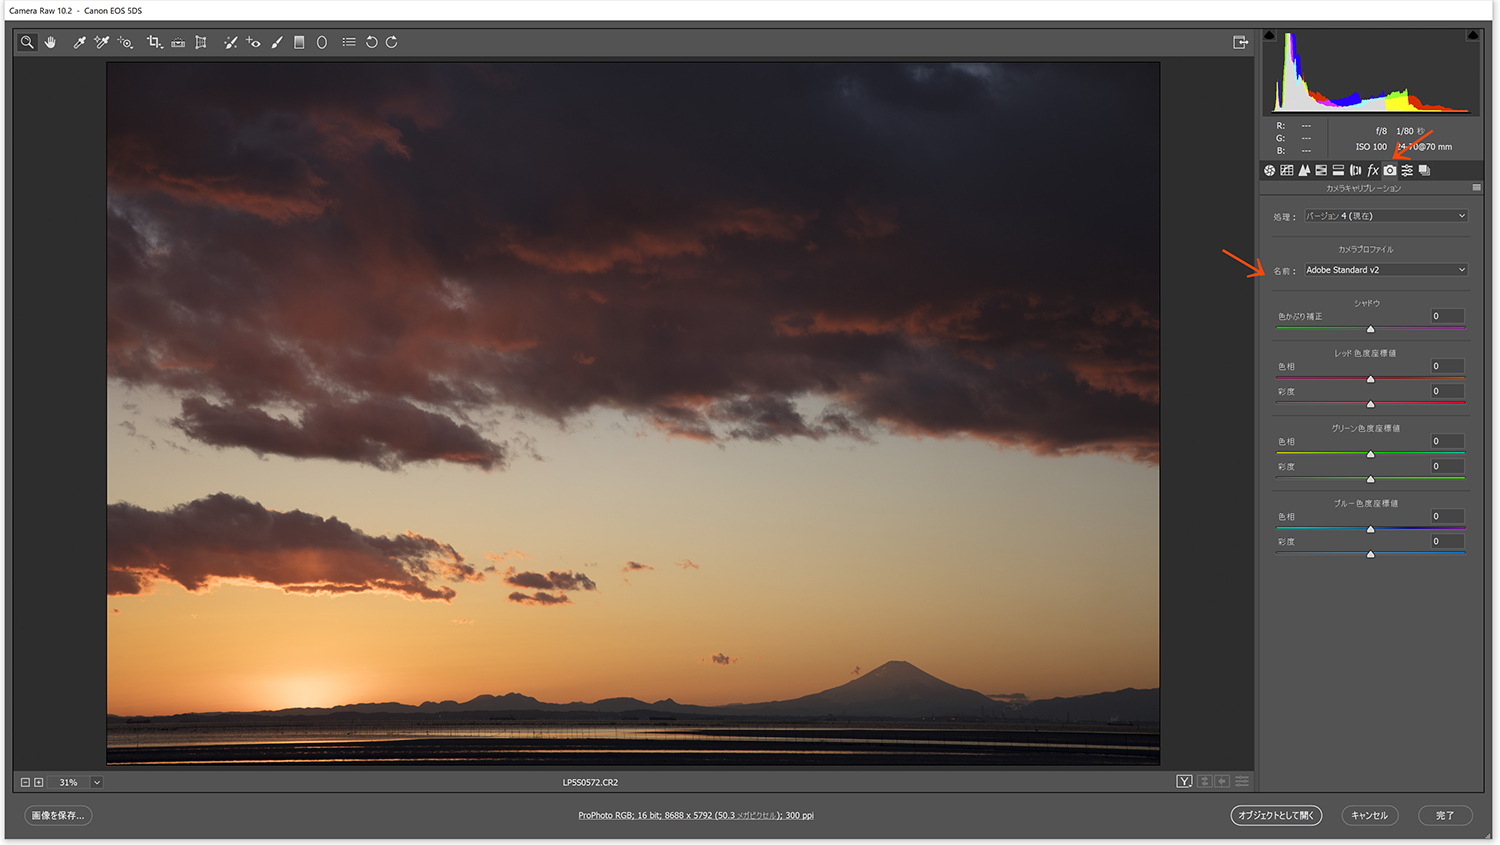
For not losing the photo quality, edit the photo in RAW as many as possible and do RGB processing in Photoshop. Open Camera Calibration panel and set the camera files. There are various options to choose.
画質を下げないためにはCamera Rawで、できるだけのことをやり、その後にPhotoshopでRGB処理する。Camera Rawを開いたら、まずは「カメラキャリブレーション」を開いて「カメラファイル」を設定する。カメラファイルにはさまざまなものが用意されている。
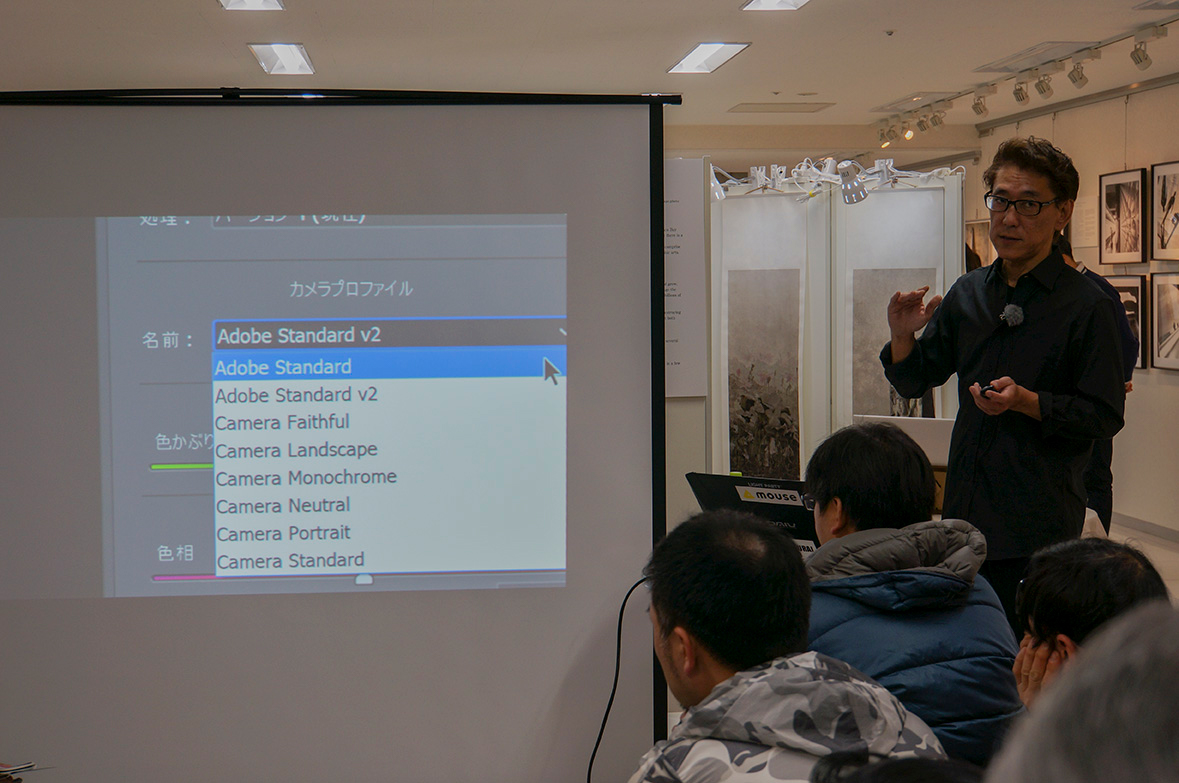
Many people select ‘camera landscape’ to make the photo color vivid but Suwa’s recommendation is ‘Adobe Standard’ or ‘Camera neutral’. He says it is easier to do post-processing.
多くの人は「風景」など、ビビッドな色調になるものを選びがちだが、諏訪先生のおすすめは「Adobe Standrd」か、色調や階調再現のニュートラルなもの。これらを選んでおいた方があとの処理もしやすいという。

Open ‘Lens corrections’ and place a check mark on ‘Enable profile corrections’. Then choose the lens that you use in photo shooting. Place a check mark on ‘Color aberration removal’ if it is needed.
「レンズ補正」を開いて「プロファイル補正を使用」にチェックを入れ、撮影時に使用したレンズを選ぶ。レンズによって色収差が気になるときは「色収差の除去」もチェックを入れるといい。
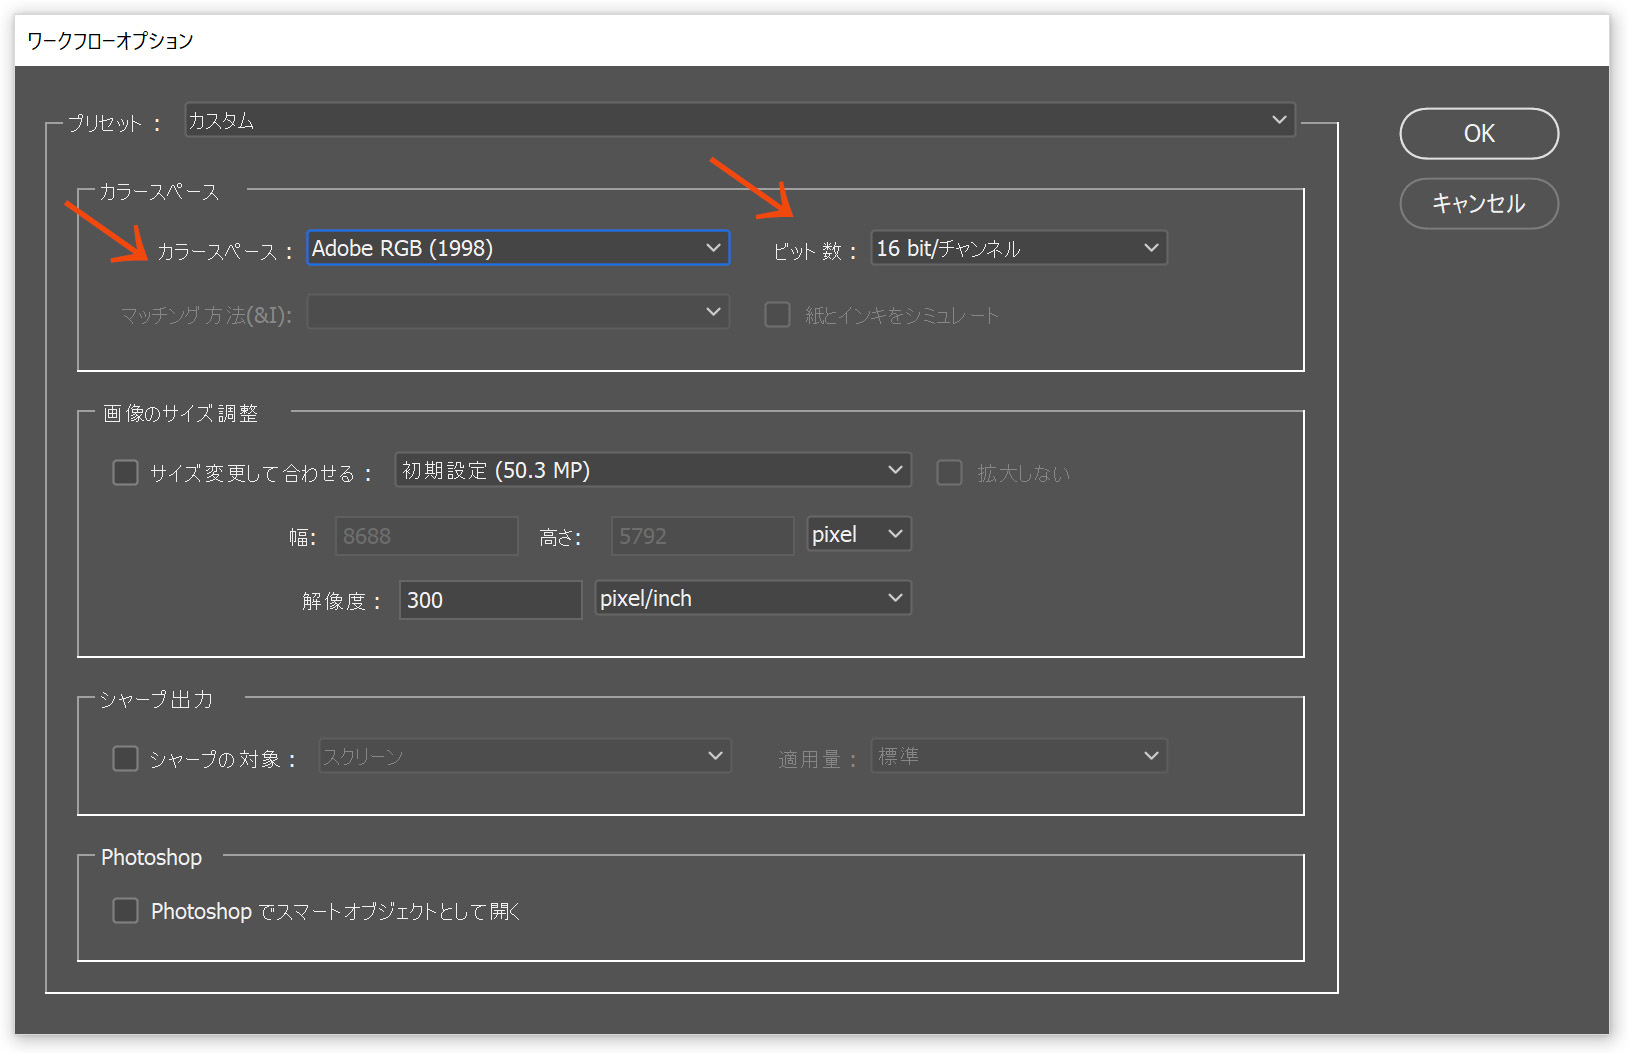
Click the color space and open ‘Color workflow option’ and set ‘Color space’ and ‘Color bit depth’ here
最下欄のカラースペースのところをクリックして「ワークフローオプション」を開く。「カラースペース」や「ビット数」など、ここで設定できるものはやっておく。
Remember to place a check mark on ‘Open Photoshop with smart object’ in ‘Workflow option’ so that the quality of the photo won’t be lost and it is always easy to get back to Camera Raw screen. You can redo Raw processing later on.
「ワークフローオプション」で忘れてはならないのは「Phptpshopでスマートオブジェクトして開く」にチェックを入れること。こうしておくと画質の劣化がなく、Camera Raw画面にすぐに戻れ、あとからRaw現像だけをやり直せるので便利。
Remember to place a check mark on ‘Open Photoshop with smart object’ in ‘Workflow option’ so that the quality of the photo won’t be lost and it is always easy to get back to Camera Raw screen. You can redo Raw processing later on.
その後にやっていくのが「基本補正」。ここでは全体的にベースを整えることを念頭に進めるがおすすめ。部分的な補正などはあとで個々にやるのがおすすめ。
Then do ‘the basic correction’. Here, you should keep in mind to adjust the base of the image in the whole picture. Then do the partial correction individually.
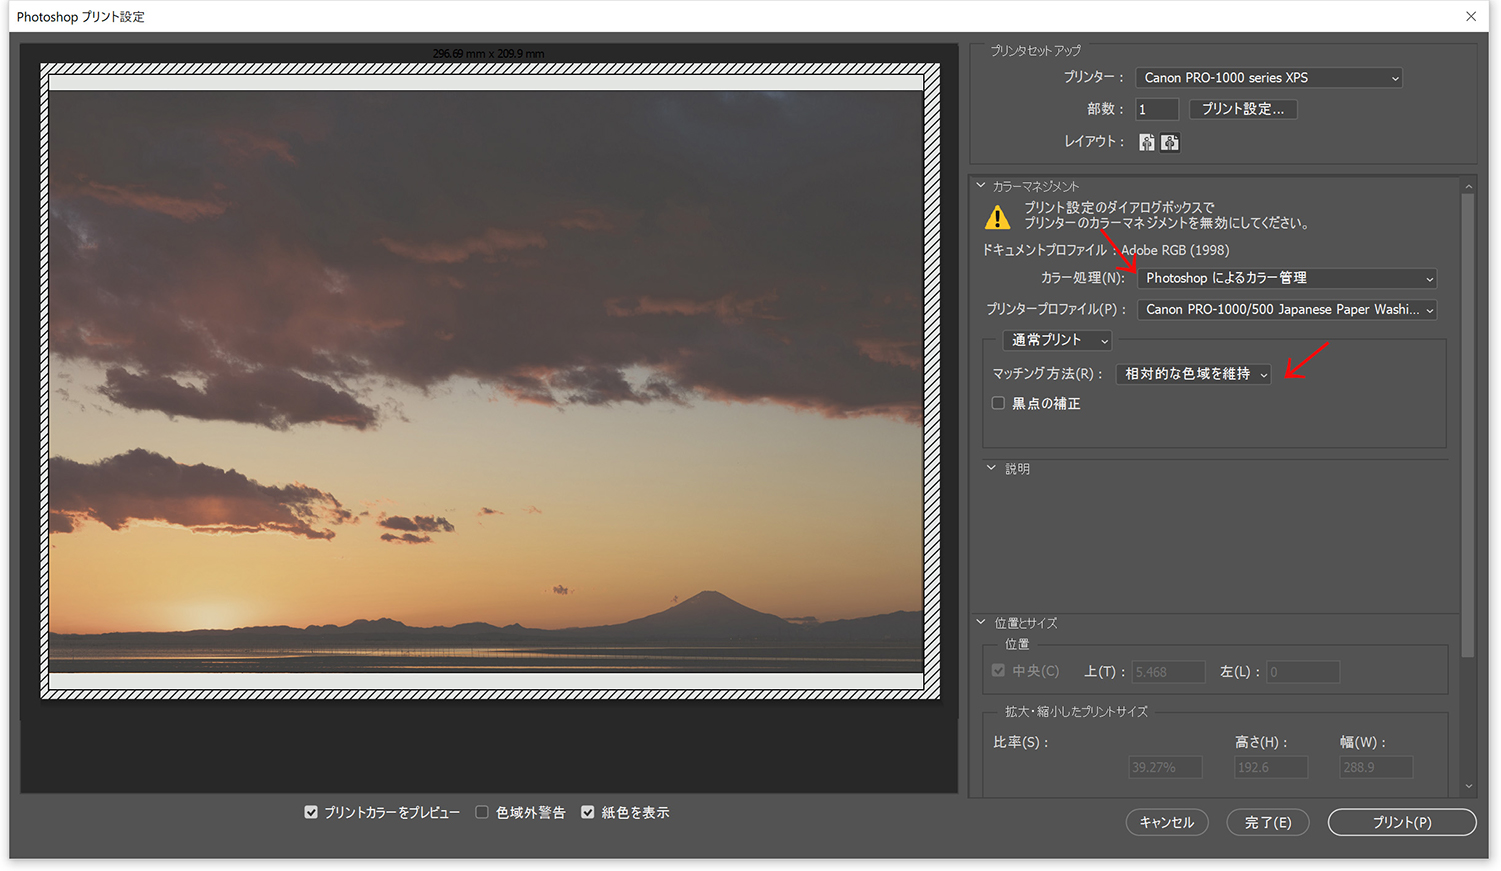
You have to be careful when you do the color settings, you should set ‘manage in Photoshop’. If you forget to do this, the color calibration will be done by the printer. Suwa says that the matching method varies among individual and he chooses ‘keep relative color gamut’.
プリント設定で気をつけたいのは「カラー設定」を「Photoshopによる管理」にしておくこと。「プリンターによる管理」にするとプリンター任せになってしまう。「マッチング方法」は作品によってや人によって異なるが、諏訪先生はカラーでは作品や人によって異なるが「相対的な色域の維持」にしているそうだ。
Feel free to contact us.
Nothing will make us happier than having visitors share their thoughts.