The Photo Exhibition of SAMURAI FOTO 2018
A Free Seminar of Joji Tomikawa, a color management specialist
SAMURAI写真展 2018セミナー
カラーマネジメントスペシャリスト
冨川丈司氏によるセミナーを開催
held on March 4th, 2018 / 2018年3月4日 開催
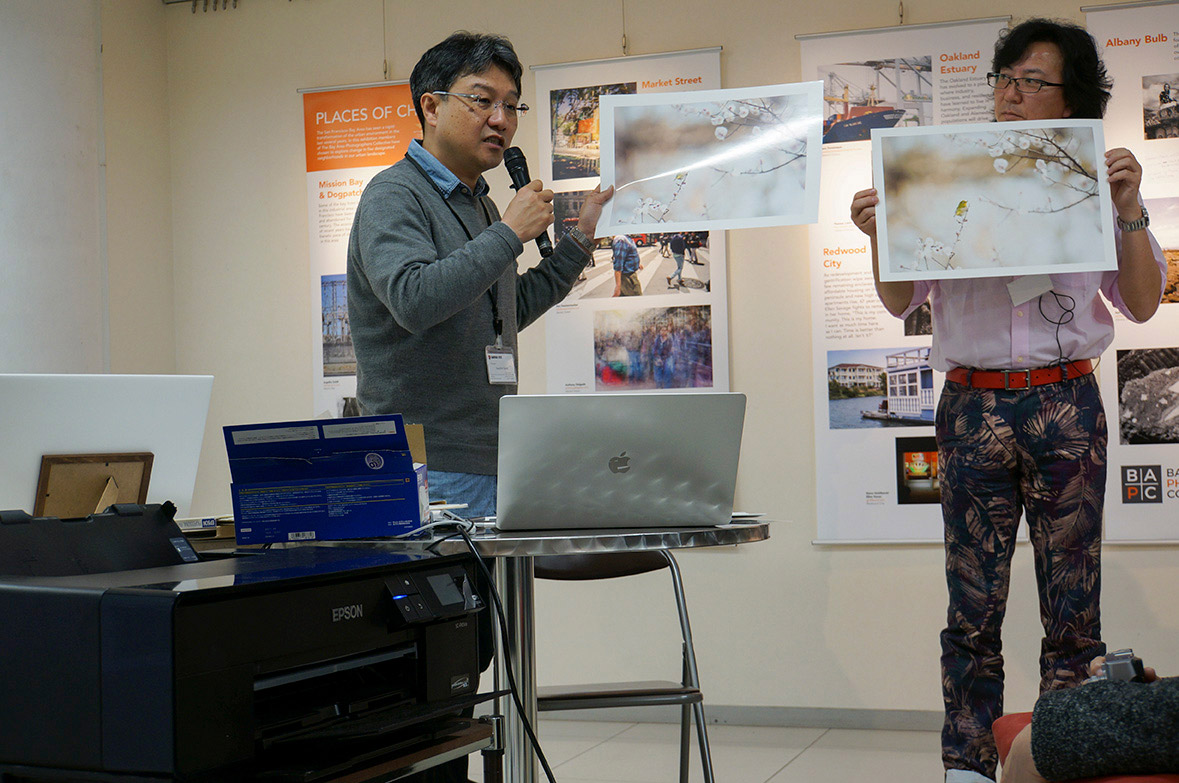
From February 27th to March 4th, SAMURAI FOTO held our 4th Photo Exhibition, “Making a beautiful bridge” at Subway Gallery M in Minatomirai station, Yokohama.
A free seminar by color management specialist, Joji Tomikawa; “Change paper, then picture will change. –how to choose a right paper for making an expressive artwork” was held.
※For the seminar schedule; Click here
※For the photo Exhibition; Click here
Provided by Epson Sales Co. Ltd.
2018年2月27~3月4日、横浜・みなとならい駅にある「サブウェイギャラリーM」で開催されたSAMURAI FOTO写真展4th “Making a beautiful bridge”において、カラーマネジメントスペシャリスト冨川丈司氏によるセミナー『用紙を替えると写真が語り出すー表現力を上げる用紙の選び方と実践方法―』を開催しました。
※セミナースケジュールについては
こちらをご覧ください。
※写真展についてはこちらをご覧ください
協力: エプソン販売 株式会社
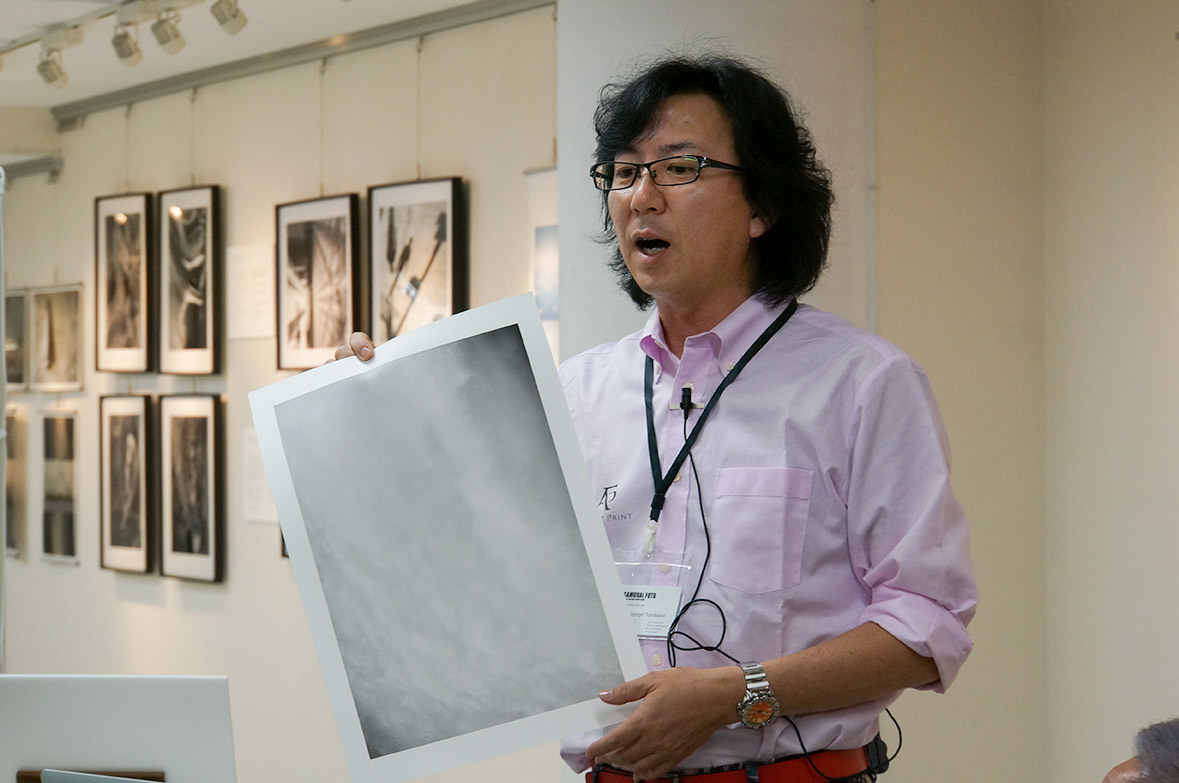
Change your printing paper from glossy paper to matte paper
「光沢紙」系から「マット紙」系へ替えてみよう
A glossy paper such as Epson Premium glossy photo paper is good for nightscape photography. But in other cases, matte paper is better because it gives more tender impression. Even it is the same photo, it creates a different impression.
夜景写真などには黒が締まるエプソンの高光沢紙クリスピアなどの光沢紙が向いているが、そのほかの写真の場合などはマット紙に替えると柔らかい雰囲気になり、同じ写真でも印象が変わってくる。
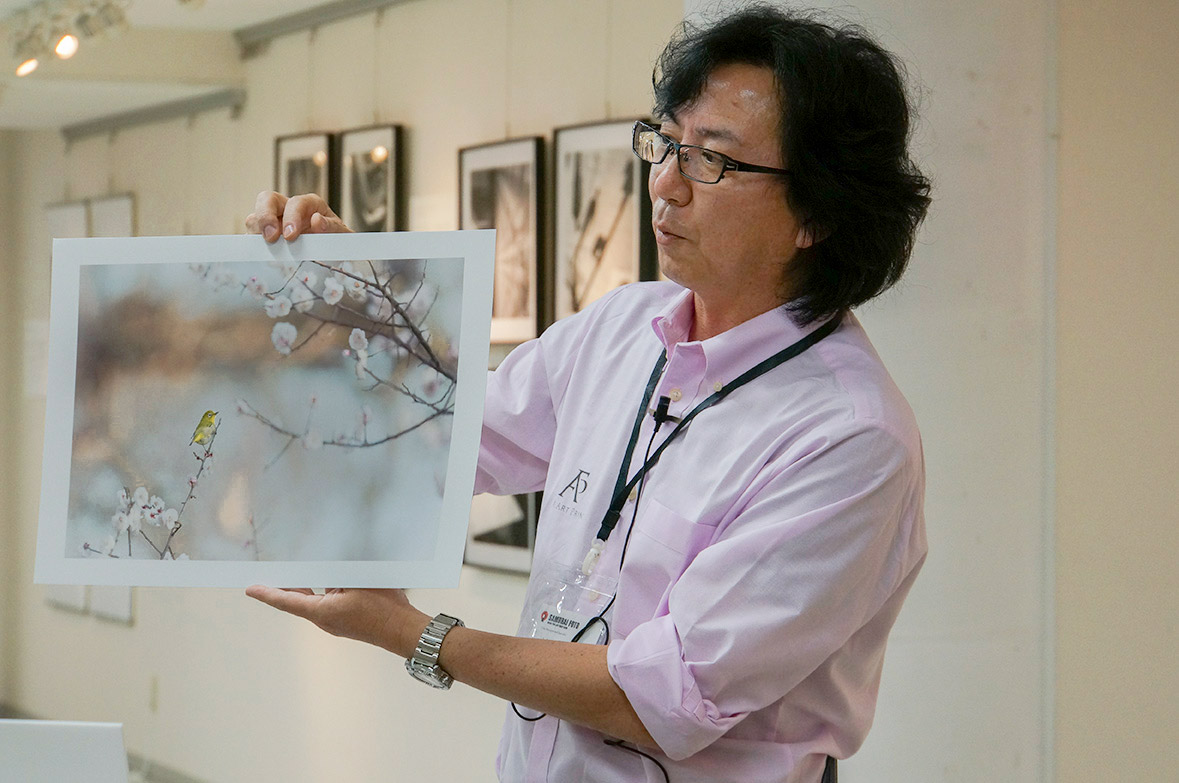
This is a photo of Mr. Sasaki, a member of SAMURAI FOTO. The right photo is printed on glossy paper and the left one is printed on matte paper. You don’t need to worry about the blurry on matte paper. Epson Velvet Fine Art paper produces great color.
SAMURAIの佐々木さんの作品をプリントしたもの。右が光沢紙で左がマット紙。マット紙だと色が出ないと心配する人もいるが、エプソンのベルベットファインアート紙のように発色性のよい用紙もある。
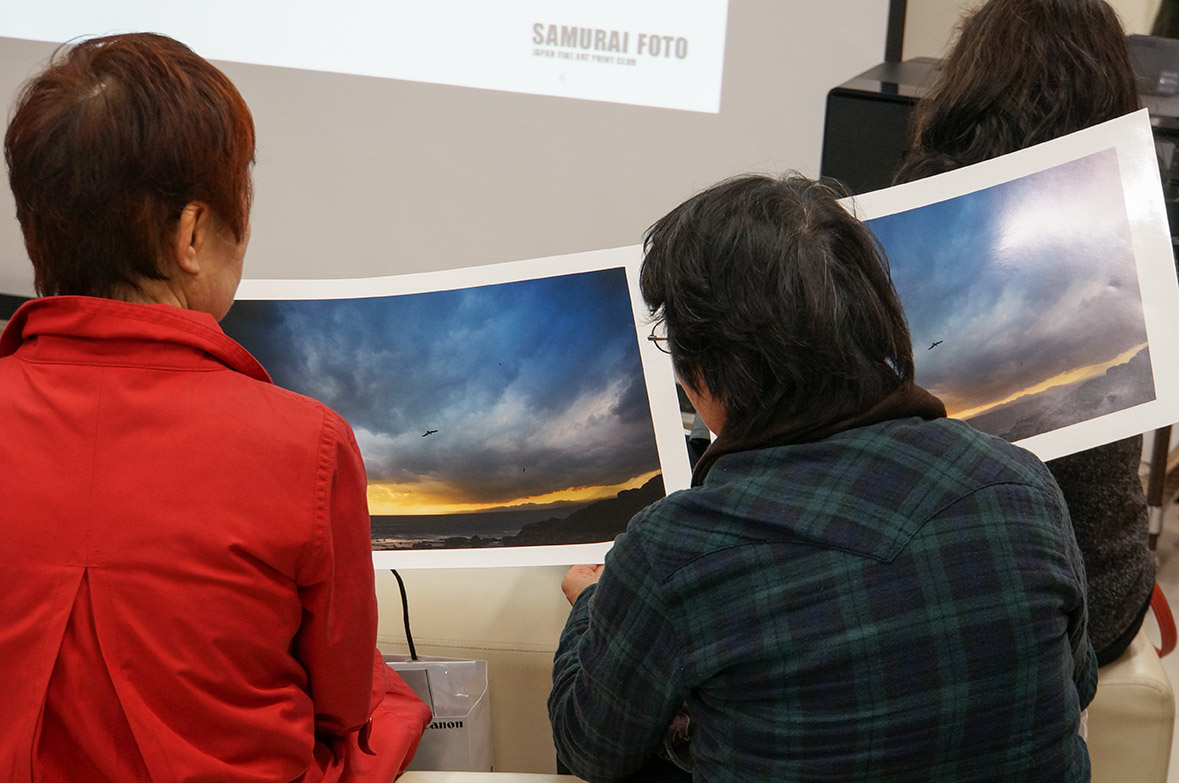
This is another photo of Mr. Sasaki. This is a close-up shot of dam discharge. Glossy paper shows the color brightly but it seems flat because of the smooth surface. Matte paper is better suited for this kind of photographs. You can express what you want to show without sacrificing the image quality.
ダムの放水時の水のアップを撮影した佐々木さんの作品。光沢紙だと色鮮やかに再現されるが、表面がツルツルで均一になる。こういう作品には面質があって表面にニュアンスのあるマット紙が向いている。
A note for the printer settings for matte paper
マット紙のためのプリンタの設定の注意点
Get ICC profiles. You can use the one that is provided by the manufactures or create it by yourself. Correct your photo with it and you can print almost the same color as the monitor you see.
まずは用紙のICCプロファイルを入手する。用紙メーカーで提供されているものを使用するか、自分でプロファイルを作成する。それを使って補正とプリントするとモニターにほぼ忠実な色に印刷が可能。
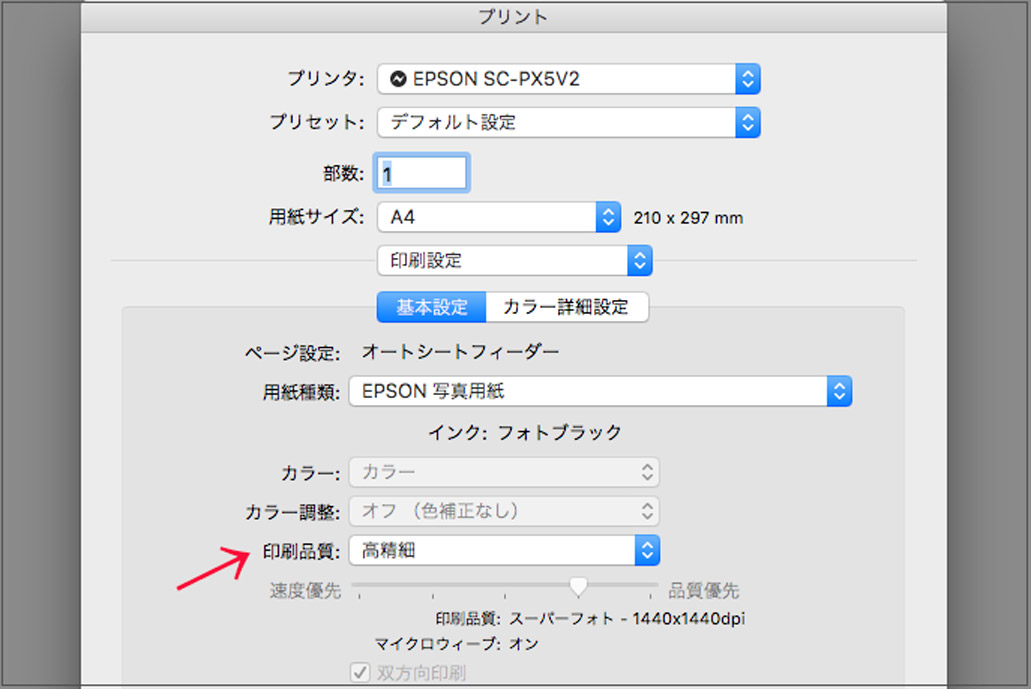
The printing quality is important. It is ok to set ‘high-definition’ when you use glossy paper but change the printing quality setting to ‘super high-definition’ when you use matte paper.
次に気をつけたいのが印刷品質。光沢紙の場合には「高精細」でいいが、マット紙の場合には「印刷品質」のところを「超高精細」にする。
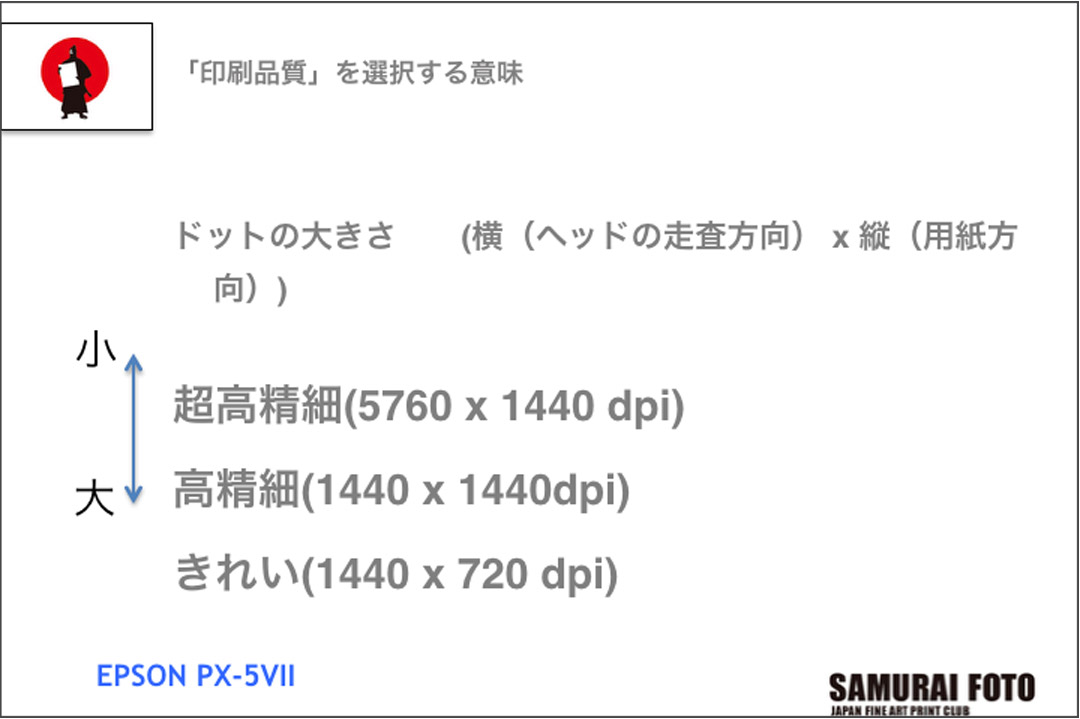
The printing quality is important. It is ok to set ‘high-definition’ when you use glossy paper but change the printing quality setting to ‘super high-definition’ when you use matte paper.
マット紙のように面質のある用紙は表面に微妙な凹凸があるような状態なので、そこにきれいにプリントするには細かいドットにしておくほうがいい。
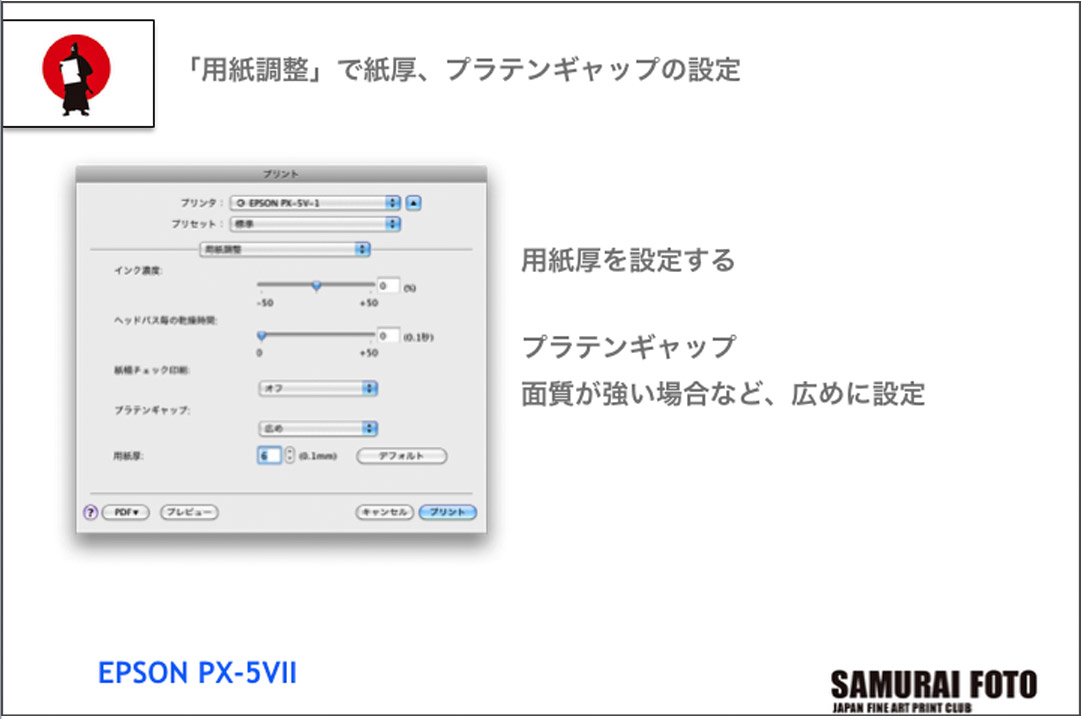
Adjust the Platen Gap settings and thickness of the paper. Put a numeric value. When the quality of the image seems strong, set the platen gap wider.
「用紙調整」で紙厚とプラテンギャップの設定をする。マット紙には厚めのものもあるので「用紙厚」にその数値を入れる。また、面質が強い場合などは「プラテンギャップ」を広めにしておく。
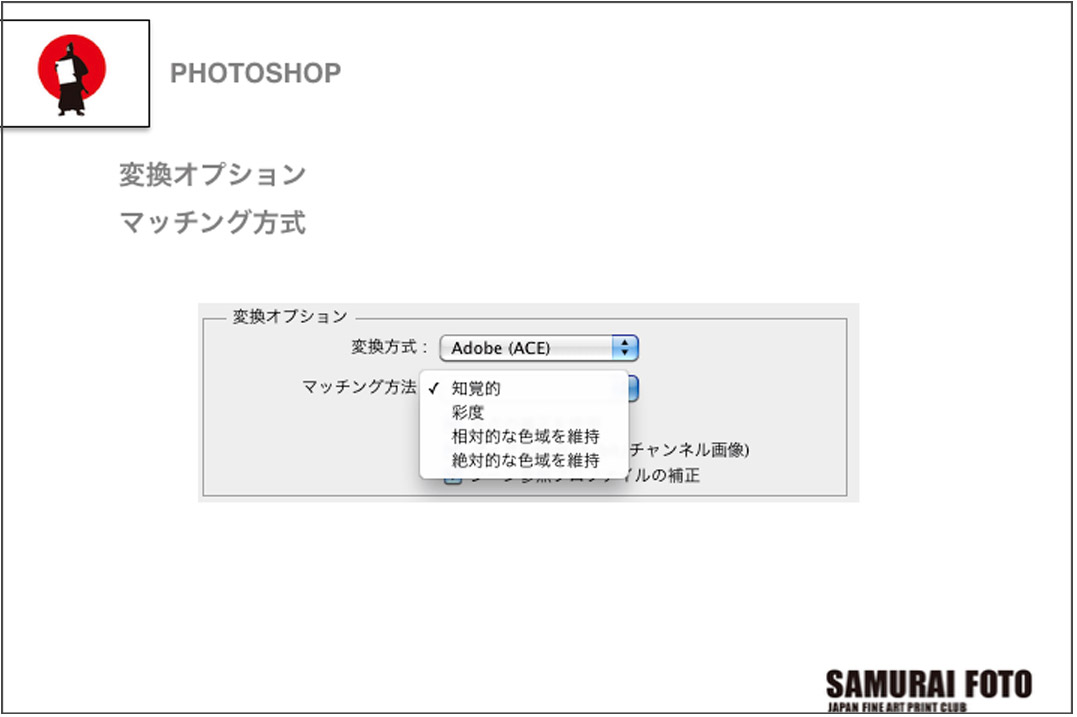
There are 4 kinds of ‘matching’ in ‘conversion options’ and you might wonder which one is the best for your photograph. Tomikawa recommends ‘perception’. It focuses on holding tone of the color.
「変換オプション」の「マッチング方法」には4種類のものがあり、どれにするか悩む人もいるが、冨川さんは階調を保持することを重点にマッチングする「知覚的」がおすすめだという。
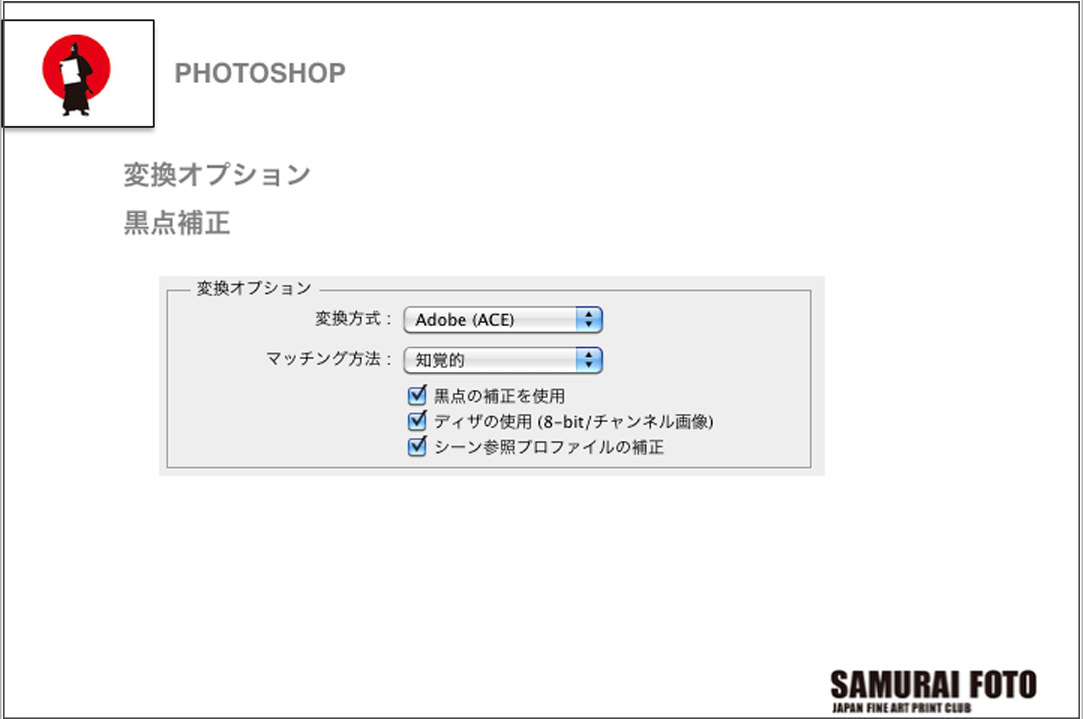
Select ‘Adobe (ACE)’ in ‘conversion method’ in ‘conversion option’. And place a check mark at all section such as ‘use a correction of black spots’ which you see under ‘matching’.
「変換オプション」の「変換方式」は「Adobe(ACE)}、「マッチング方法」の下にある「黒点の補正を使用」などにはチェックを入れておく。
EPSON PRINT LAYOUT is the easiest and convenient way to set
簡単便利な Epson Print Layout がおすすめ
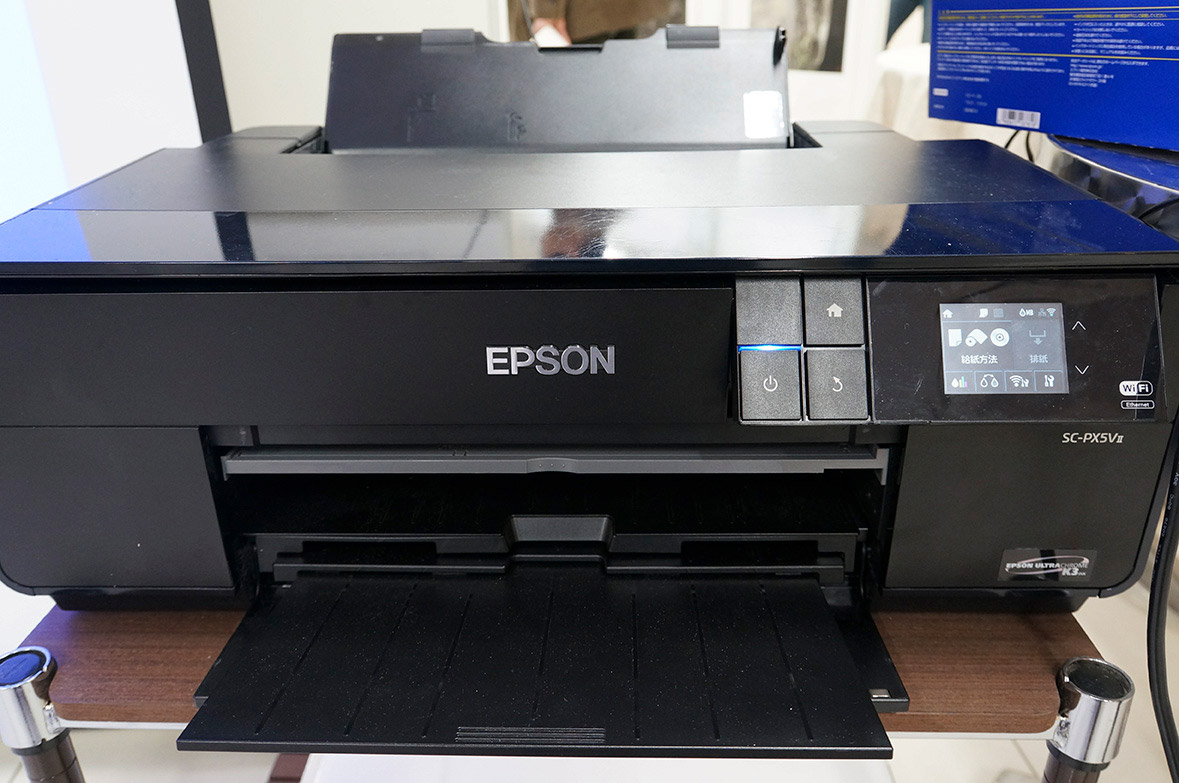
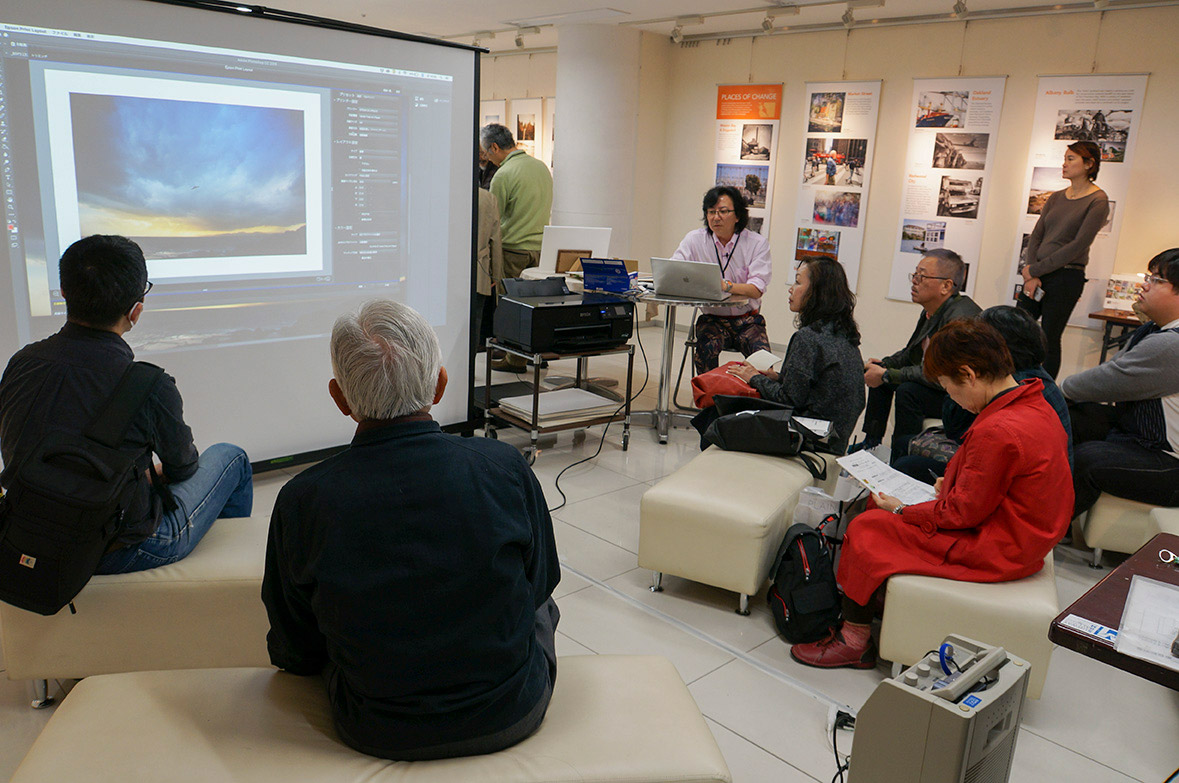
Many of SAMURAI members love to use Epson pro selection printer. This time Tomikawa showed us how to set up a printer with SC-PX5VII.
A2ノビ対応プリンタのSC-PX3Vなど、SAMURAIメンバーにも愛用者が多いエプソンのプロセレクション。今回はSC-PX5VⅡを使って、実際のプリント設定を見せてもらった。

This shows a Photoshop printing settings. (case of Mac computer) In this case, you have to remember the former data of your printing setting. In addition, you have to set the printer as described above.
こちらがMacの場合の「Photoshop プリント設定」画面。これだと以前に使った用紙のプリント設定をメモするなどして自分で覚えておかないといけない。また、ほかに上記のようなプリンタの設定も必要になる。
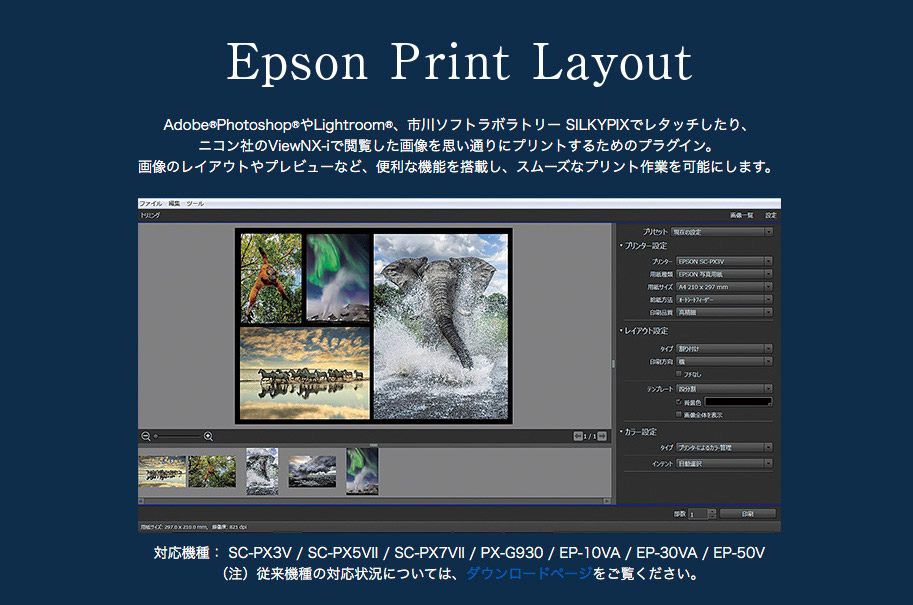
Epson Print Layout is convenient for setting. You can go printer directly from Photoshop without using print driver. You can download from Epson’s web site.
Epson Print Layout ならプリンタのドライバーを使わずにPhotoshopから直接プリンタに行けるので便利。エプソンのwebサイトからダウンロードできる。
Download here / ダウンロード先
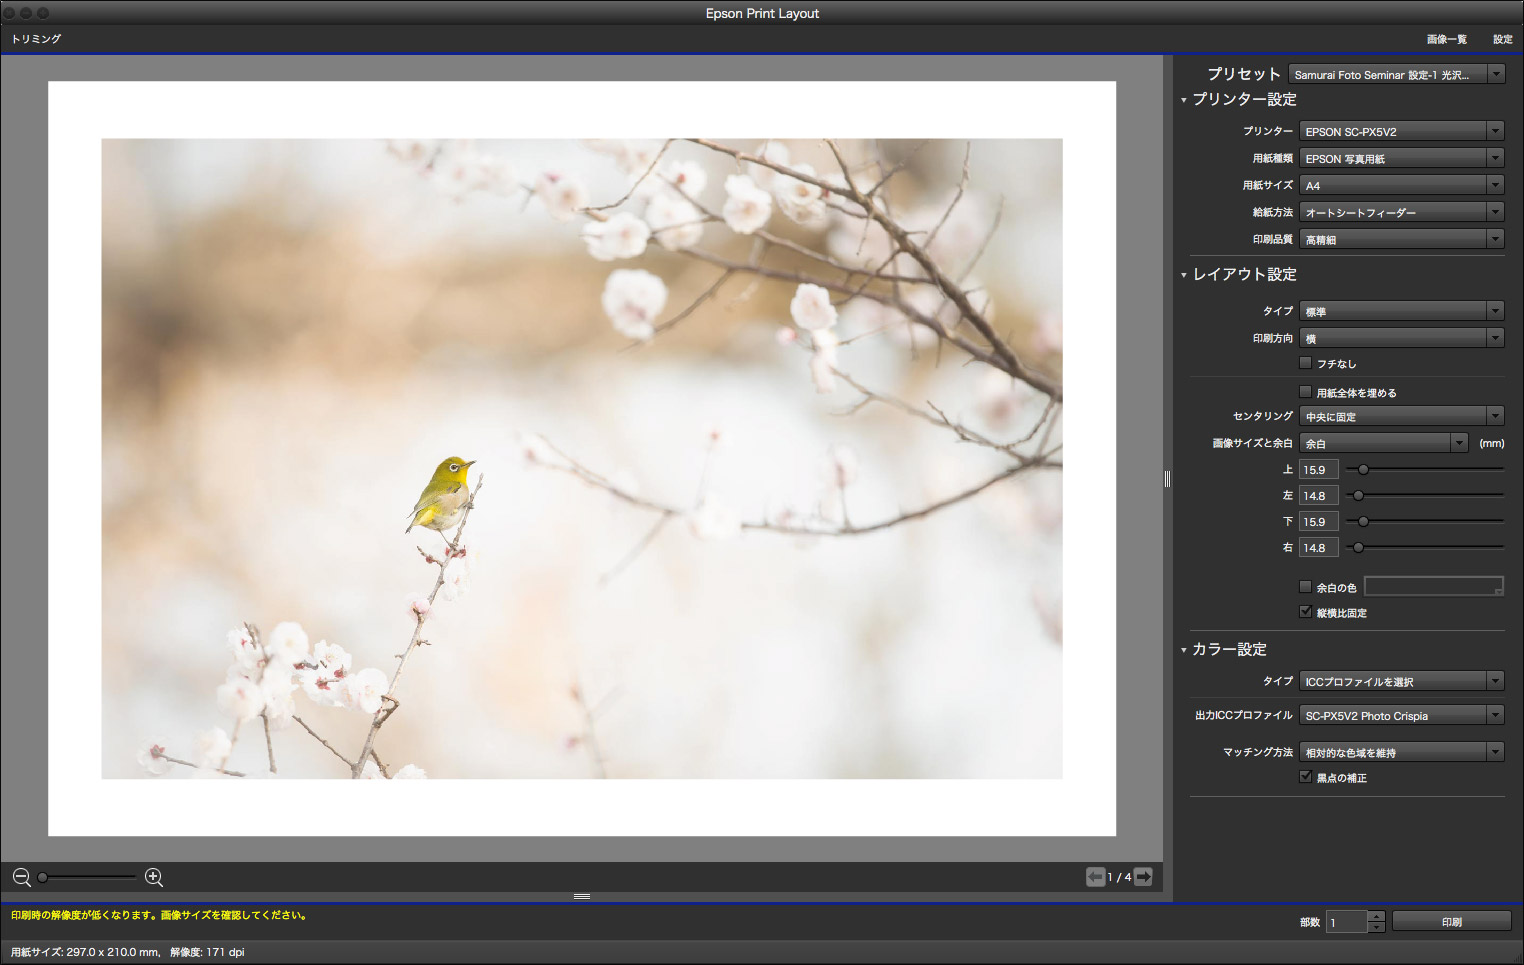
This shows an Epson Print Layout setting. You don’t need another setting for the printer. After downloading, you just go File>automatic processing>Epson Print Layout.
こちらがEpson Print Layout の設定画面。ここでの設定だけでプリンタの設定の必要はない。ダウンロードしておけば、Photoshopの「ファイル」→「自動処理」→「Epson Print Layout」で開くことができる。
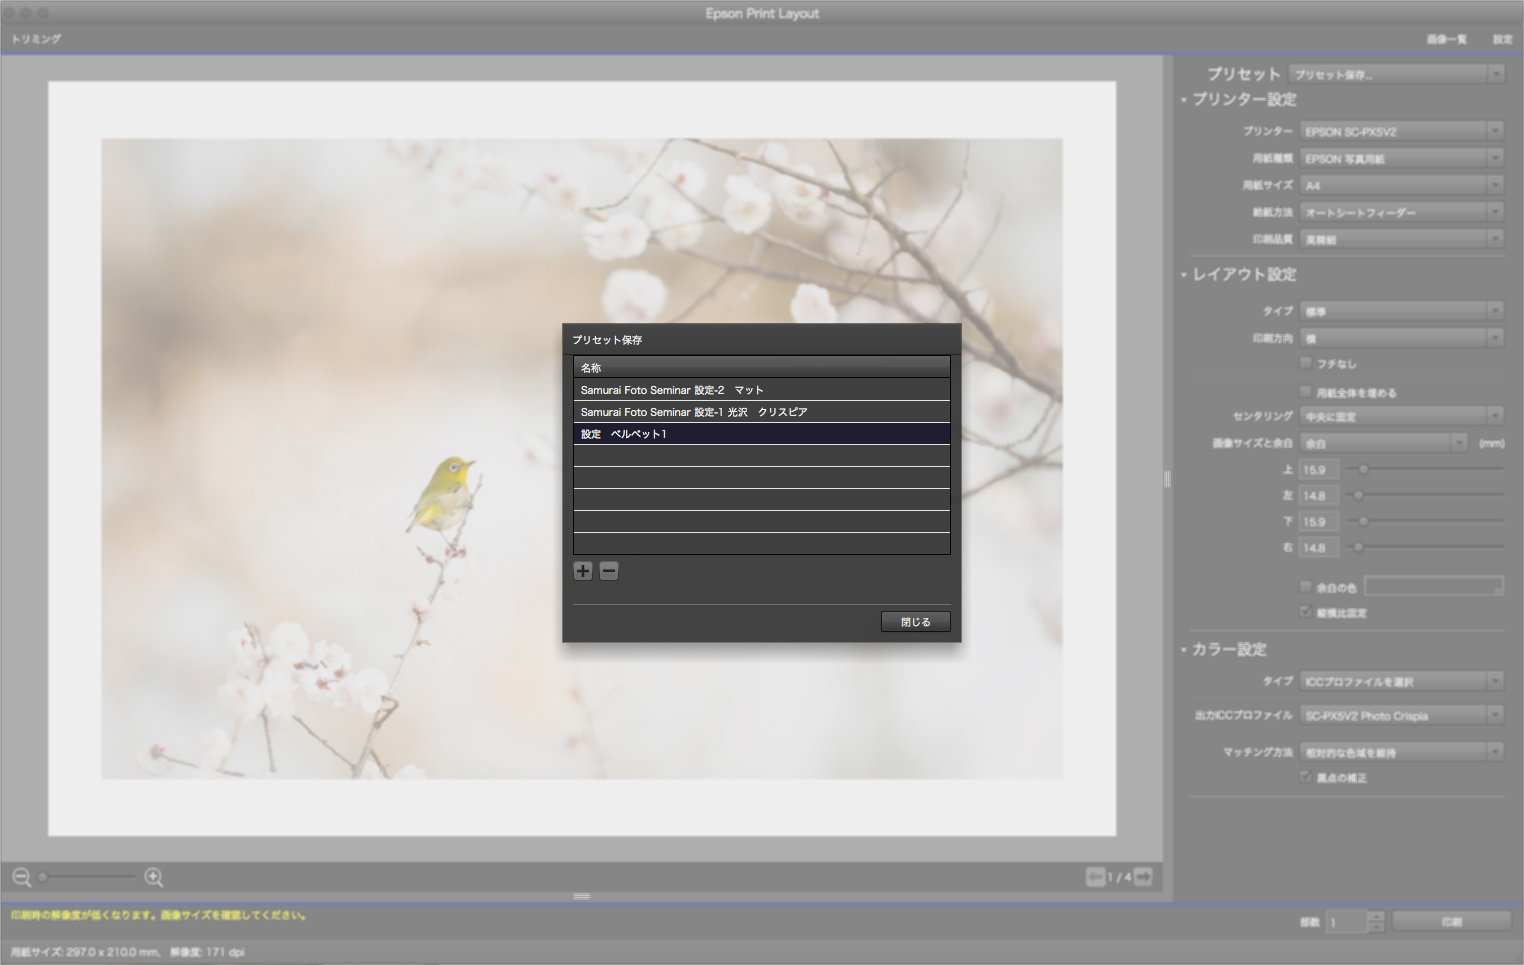
You can save the settings. It is very convenient. You do ‘Preset saving’ on each paper, you don’t need to do the same setting if you use the same kind of paper.
プリントする側にとって最も便利なのはここで一度、設定した内容を保存しておけること。用紙ごとに「プリセット保存」しておけば、同じ用紙のときにはこれを読み込むだけで設定の必要がなくなる。
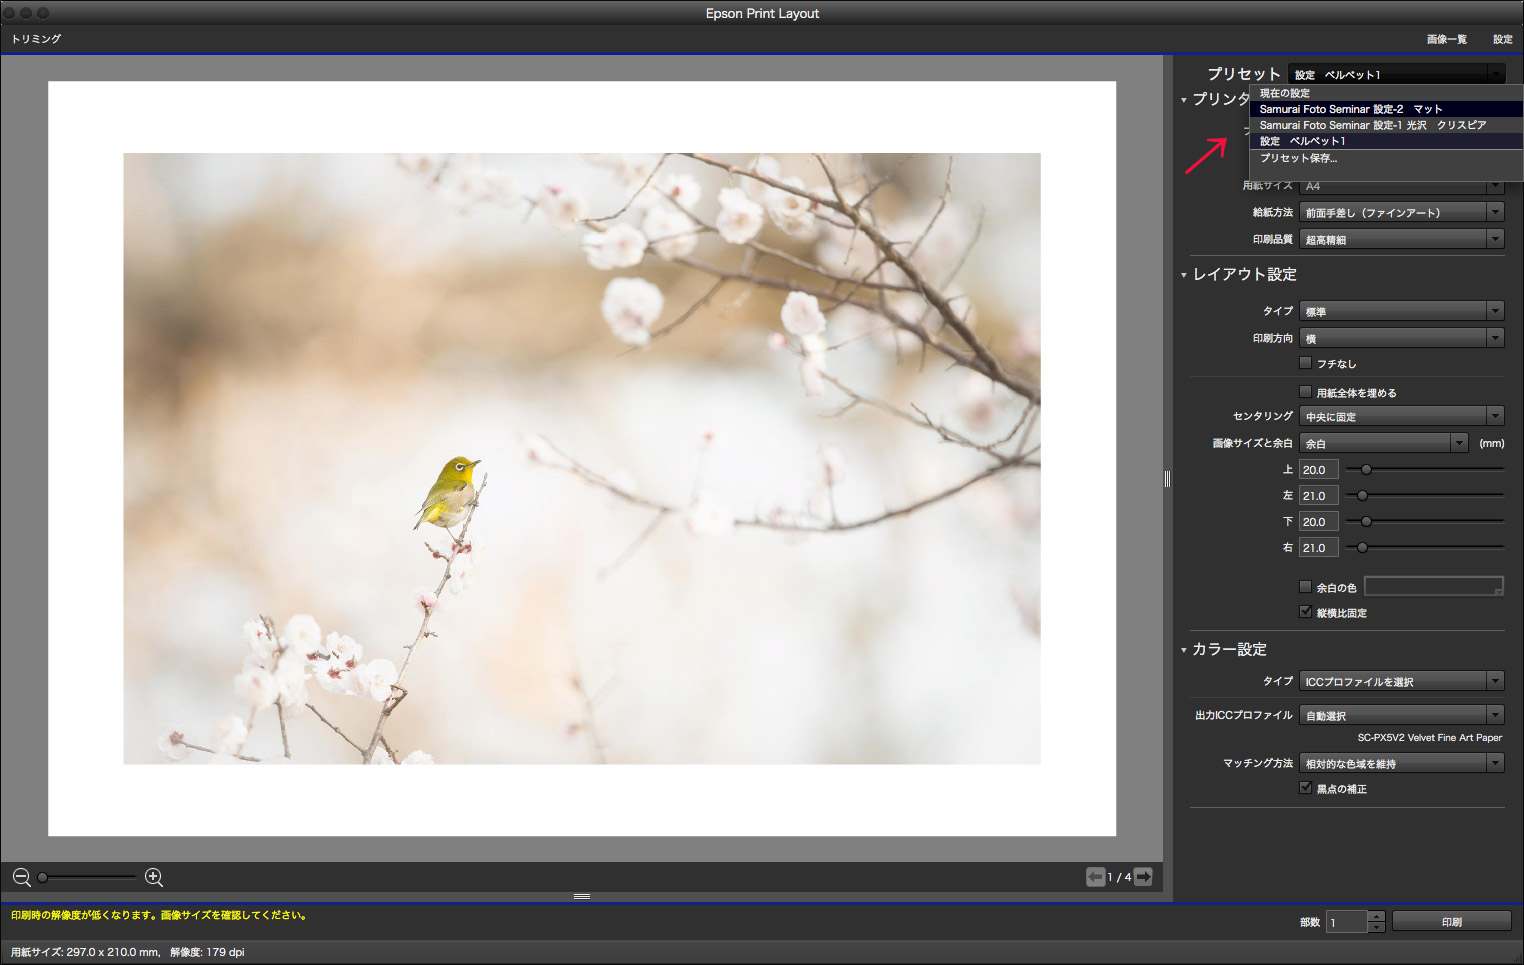
Once you’ve saved the setting, it shows you the type of paper automatically when the photo image is loaded. You just start printing with the printer. It is easy and can be shortened the time.
一度保存しておけば、このように自動的に用紙の種類が出てくる。ここで使用する用紙を選べば、あとはプリントするだけなので簡単。時間もかなり短縮できる。
Feel free to contact us.
Nothing will make us happier than having visitors share their thoughts.